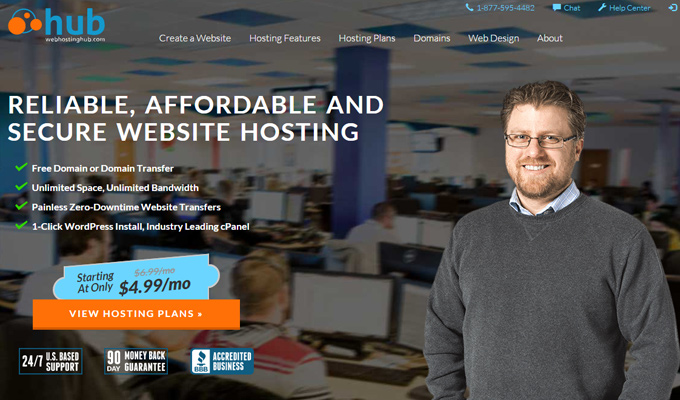
WordPress is the most popular blogging platform because it’s free, highly-supported, and really easy for beginners. Most web hosts support WordPress as a default installation package. One such host is Web Hosting Hub that has a super-simple installation process for creating a brand new WordPress site.
One great thing about Web Hosting Hub is that each new account is given a free domain name with each purchase. So you can setup a new WordPress blog with a free domain name and some very affordable hosting. Talk about convenience.
The following guide will outline steps for installing WordPress on a new Web Hosting Hub account. Their servers use a setup environment named Softaculous which is an auto installer. This allows webmasters to install brand new programs in minutes without any manual work at all.
No doubt Web Hosting Hub is a fantastic hosting company for a new blogger. Just follow these steps and you can have your own WordPress site up online in less than an hour.
Step 1: Register a New Account
From the Web Hosting Hub homepage you can view their current hosting plans, or go right to the WordPress hosting page.
Both pages include a set of 3 different hosting account options.
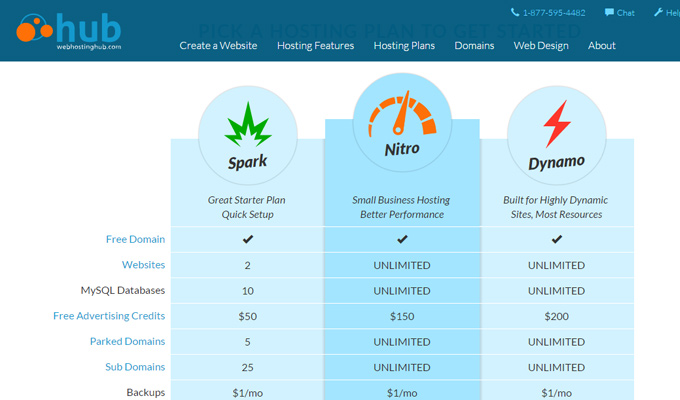
New webmasters really don’t need to spend much money just to get a blog online. The Spark plan comes with a free domain name and some other benefits like $50 of advertising credits on Google AdWords.
The other hosting plans will cost more money without a whole lot of benefit to the average blog owner, so it’s recommended that you stick with the Spark plan. It’s always possible to upgrade at a later date.
But for now click the “Get Started” button underneath Spark and you’ll be taken to a domain signup page.
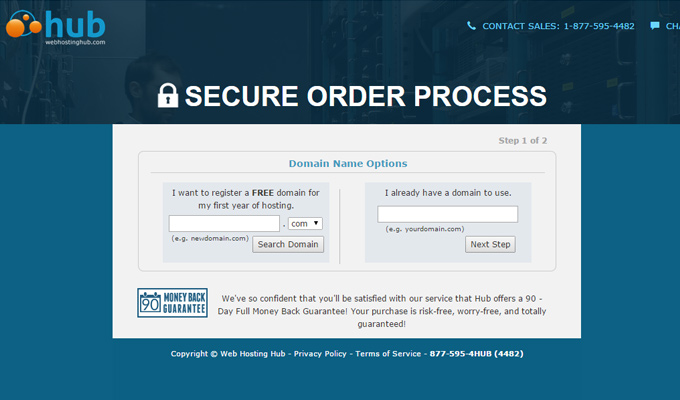
If you already have a domain registered elsewhere then you can enter this in the box labeled “I already have a domain”. Note that if your domain is registered elsewhere like GoDaddy you’ll need to edit the domain’s nameservers to point toward your Web Hosting Hub Server. But this can be covered later.
For those who do not have a domain name it’s best to take advantage of Web Hosting Hub’s free domain. This will get you any domain of your choosing free for 1 year.
It’s a good idea to first check if your domain has already been registered. Use a tool like InstantName to see if your domain is available. If not just keep thinking of new ideas until you come up with something that you can register.
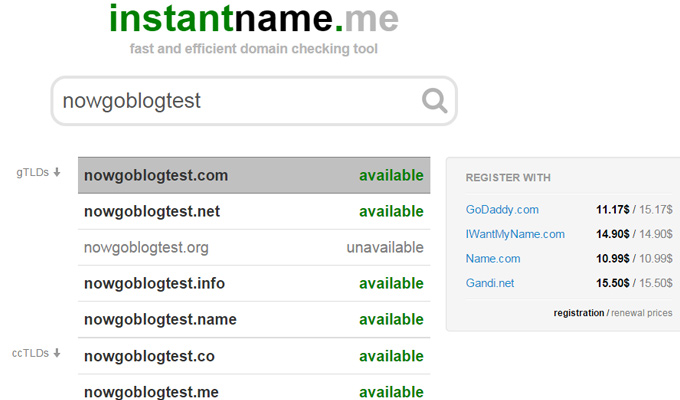
Once you find something great enter it into the Free Domain box on the left. It’s best to stick with a .com domain because these are the most popular, but a .net domain is also a fine choice.
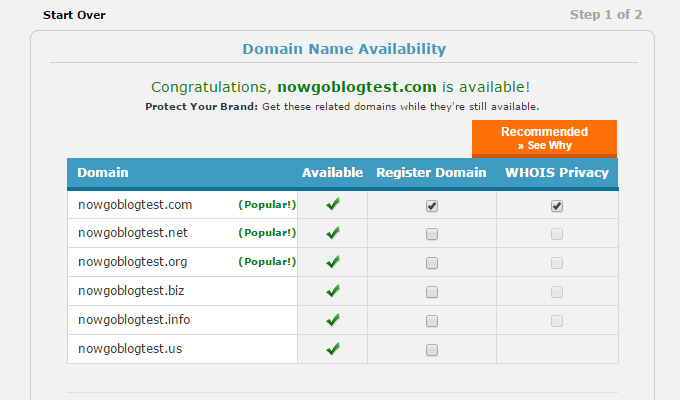
Once you’ve selected a domain you’ll be offered a few other extra options. Note that your domain will be free for a year, but if you want extras like domain privacy it will cost some money.
Domain privacy isn’t really needed but it’s something that webmasters use to hide their contact data from the domain name. This info is mostly used by other companies who may want to buy the domain, so it’s not a risk for spam and certainly not hackers.
Once you’ve selected your domain & WHOIS privacy settings you can move onto the next step. This is where you’ll add contact information for your account along with billing information.
There are also some deals related to data backups and McAfee Anti-Spam protection. It’s doubtful that you’ll need any of this stuff so you can just select “No Thanks”.

It’s important to note that down near the billing details you need to select a payment cycle. By default the plan will start at 36 months, or one payment every 3 years. This saves money in the long run but you wind up paying a lot upfront.
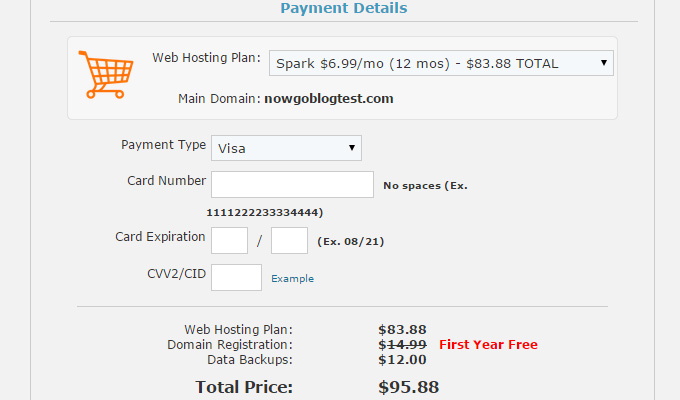
It’s often better to choose the 12 month plan where you get billed once a year. This will average out to $85/year which is a more manageable choice for new bloggers.
Finally before clicking Purchase take a look at the box advertising pre-installed CMS engines. While signing up for your new server it’s possible to have WordPress automatically installed. This is a fine way to go if you choose, but for this guide you’ll learn how to setup WordPress on your own using Web Hosting Hub’s customized installation tool.
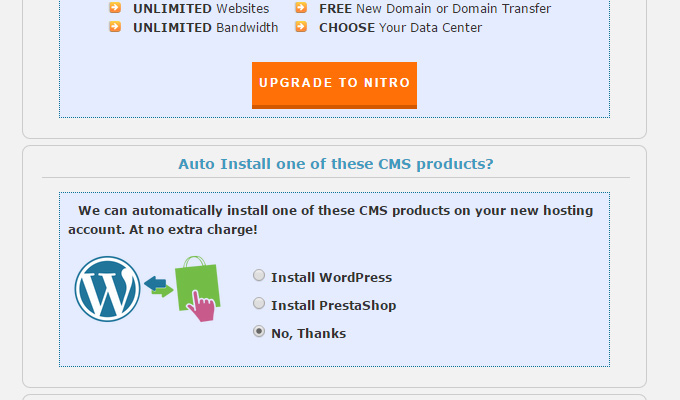
If you want to do the automatic install that’s fine. It should be setup within minutes and you won’t have to worry about any database stuff.
On the other hand it’s worth learning how to use Web Hosting Hub’s installation service just in case you launch another WordPress site in the future.
So at this point we’ll select “No, thanks” to auto-install and click Purchase. The order will be placed and the new hosting environment is ready in minutes.
If you got a free domain with the server you can skip down to Step 3. But if you have a domain purchased through another registrar you’ll need to update the nameservers on that domain name. You can do so by following Step 2.
Step 2: Updating Name Servers(optional)
First you’ll need to log into the domain registrar account wherever your domain is located. Find the list of domains for your account and select the one you want to point towards Web Hosting Hub.
For Godaddy users the domains are listed in a table. When you select one domain the top icon links become active. You’ll want to click the yellow stack with the label “Nameservers”.
This will bring you to a new page with default name server settings.
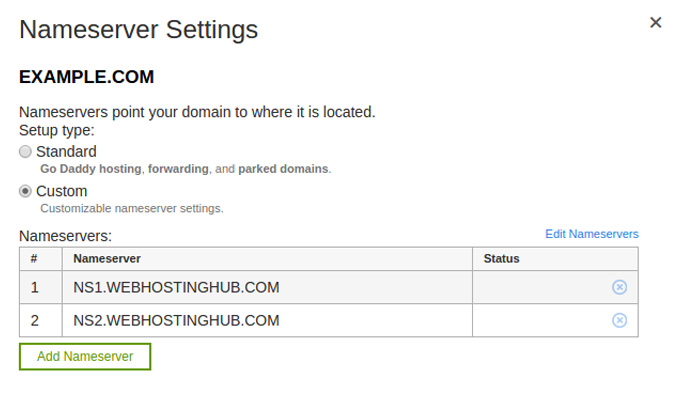
Most newly-registered domains have 2 or 3 name servers. You need to replace the first 2 nameservers so they point towards Web Hosting Hub, and subsequently point to your new hosting account. Based on this support article the 2 nameserver values are:
- ns1.webhostinghub.com
- ns2.webhostinghub.com
It’s fine to leave the 3rd nameserver alone. This can be used as a fallback just in case you ever want to change the nameservers back to default. But it won’t do any harm if you delete the 3rd nameserver because it won’t be used very much at all.
Now save these name servers and wait for the changes to take effect. Name server updates are tricky and could require anywhere from 5 minutes to 5 hours or even a whole day. Most of the time it’s a quick process, but it depends on various circumstances which are out of your control.
You can check if the nameservers have been updated by visiting your domain name in a web browser. By default your domain will point to an empty GoDaddy landing page, or a landing page for your domain registrar.
But once the nameservers have been updated your domain name will load a Web Hosting Hub landing page.
At this point you’re ready to move on and install WordPress.
Step 3: Installing WordPress
Once you’ve successfully signed up for a new account you should get a confirmation email from Web Hosting Hub. This email will include your username & password to log into the site.
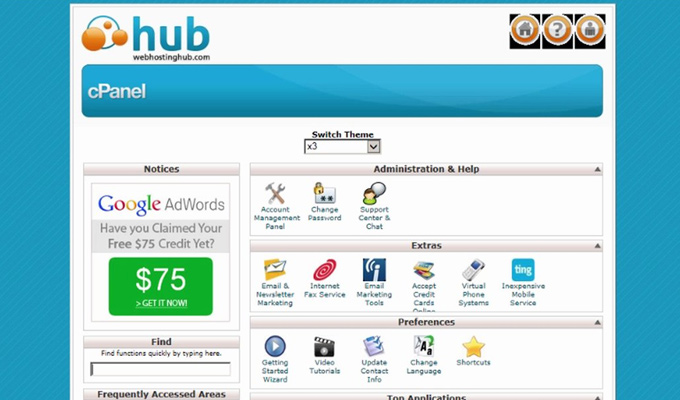
You’ll want to log into your account and find the link to “cPanel”.
If you can’t find the link you can also access cPanel from your domain using the URL /cpanel. So for example if your website domain is somesitexyz.com, you can always access cpanel directly from the URL somesitexyz.com/cpanel.
The login details for cPanel will be exactly the same as your Web Hosting Hub login. But if you are having trouble you can always reset your password from your control panel, or contact Web Hosting Hub directly for a password reset.
Once inside cPanel you should find a bunch of boxes with little icons inside. There are two distinct ways you access the same WordPress installer.
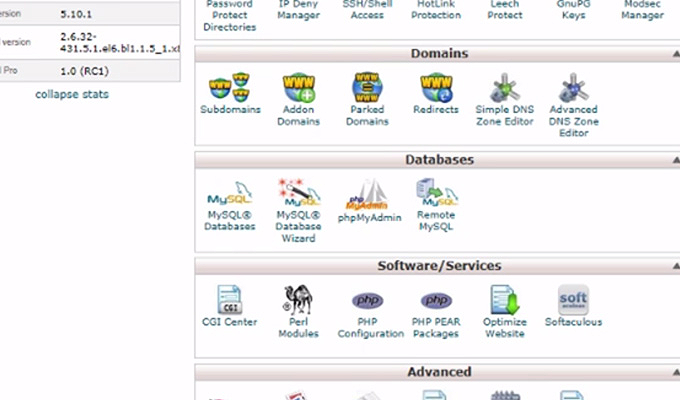
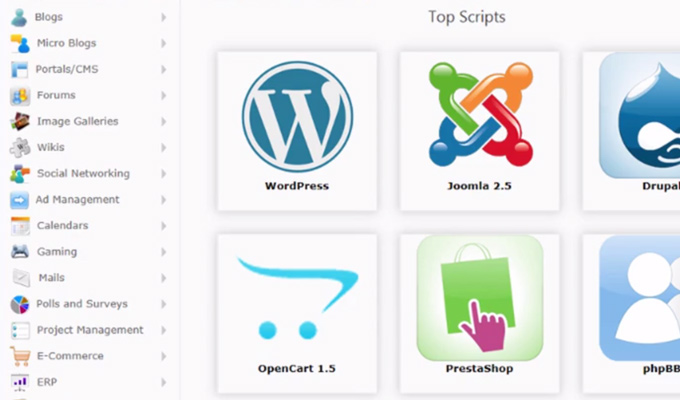
First is in the “Applications” box which lists WordPress among some other apps. The other method is down in the “Software/Services” box with the Softaculous link. Both links should bring you to the same installation process.
The first page covers some basic features of WordPress. This includes the current version number and total space required for the installation. Click the blue “Install” button in the top-right corner to move onto the next stage.
At this point you’ll be required to enter all the information for your new blog. “Protocol” can be left as HTTP and the domain should default to your only domain on the hosting account. If you have more than one domain, change this menu to the domain where you wish to install WordPress.
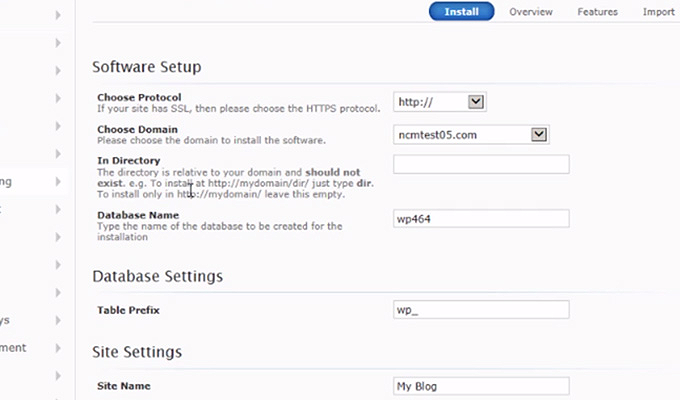
The database name can be left alone unless you specifically want to use something of your own. It will not have an effect on the blog, so the database name really doesn’t matter as long as it’s unique.
Table prefix can also be left as wp_ since this is the standard choice for most WordPress databases. Again this won’t have any visible effect on your blog so it really doesn’t matter.
Underneath “Site Settings” is where you have to start filling out crucial information. Give your new blog a name followed by a description or tagline. This name & description can always be changed from the WordPress settings panel at a later time.
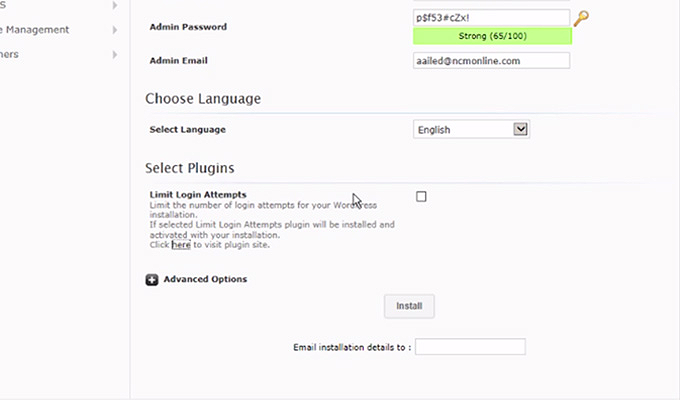
Finally you need to create an administrator account for the new site. This includes a username, password, and email address.
This email will be used to send notifications if the site has been updated, but it’s also used to reset the admin password in case you ever forget. So make sure to use an email that you check frequently and can access when needed.
Choose anything you like for the username/password combo as long as you’ll remember the details.
This username & password combo will be your own personal account on the blog. You’ll be required to log into this account every time you want to edit something or write a new blog post.
Lastly select an installation language and hit “Install”. The process should not take more than a few seconds to complete. When it’s done a success message will appear with a link to your new login page. From here you can log into your new WordPress site and get started blogging.
Take note that you can’t get back to this success page, so it’s worth memorizing the login URL. It will always be tacked onto your domain name as /wp-login.php or simply /wp-admin/.
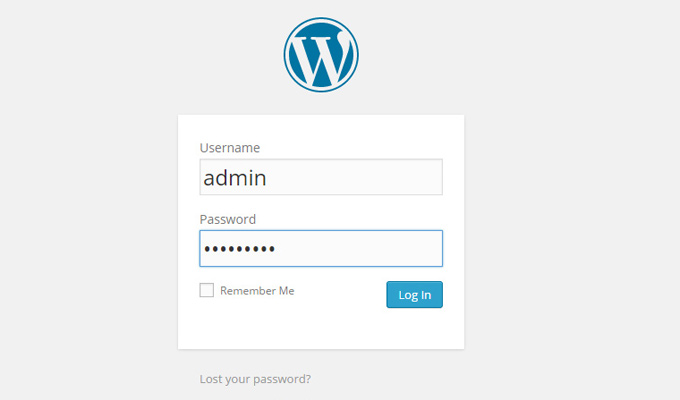
So if your domain is somesitexyz.com then you would log into WordPress by visiting somesitexyz.com/wp-login.php.
And now your new website is all set to go! You can start by customizing WordPress settings, installing a new theme, or writing a fresh new blog post.