The WordPress.com platform is a great introduction to WordPress. Bloggers can learn about the WordPress system without the need to install their own website.
But at some point many bloggers want to move up to that next level. WordPress.com sites are limited in features, they use forced subdomains, and they’re generally not the best choice for a high-quality website.
This guide is for anyone who has a WordPress.com blog and wants to transition to a self-hosted WordPress.org blog. Since WordPress is a free platform it won’t cost any money to backup your blog’s data.
But keep in mind that you will need to pay for a web host and domain name if you haven’t done so already.
1. Choosing a Domain & Webhost
The first step before moving anything is to choose a web hosting company. There are dozens to choose from and they’re not all created equal.
If you’ve been blogging on WordPress.com for free then you probably just want a simple hosting plan. Bigger companies offer beginner plans including HostGator and Bluehost. If you’re thinking of starting a blog on one of these providers then take a look at our guided setups for each.
Since this guide is meant for transitioning content we’ll stick with a WordPress-valued service like Bluehost.
Another important step is to decide on your domain name. This will be the new address for your blog since it’ll be moved off WordPress’ servers. So for example your current domain might be somethingcool.wordpress.com and you could then switch to somethingcool.com.
Unfortunately there are hundreds of millions of registered domains, so it may take a while to find a domain which is available.
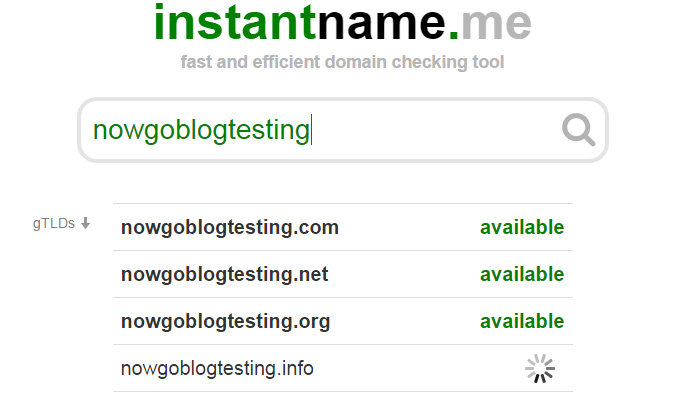
Use a tool like InstantName to check if your idea(s) have already been registered. This tool is great because it’ll suggest other related domain names and tell you which ones are available.
When registering your new hosting account you’ll be able to sign up for a domain at the same time. Otherwise you could register the domain separately from a domain registrar like GoDaddy. For most people it’s easier to register the host & domain from the same company, but if you’d prefer to use a registrar that’s fine too.
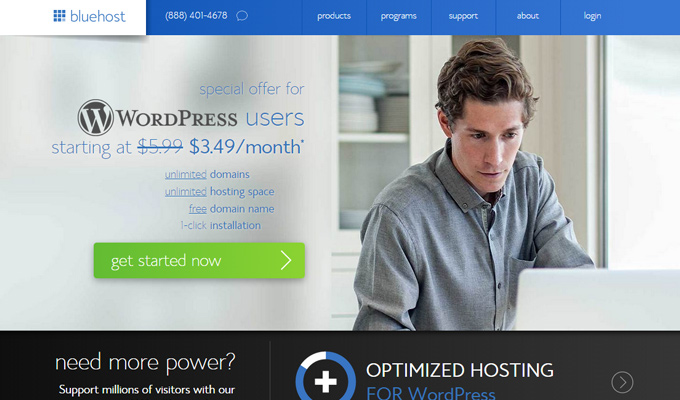
For this example let’s assume Bluehost is your hosting company of choice. WordPress users get a small deal and a completely free domain name when using Bluehost. This is why it’s recommended throughout the WordPress community as a great company for beginners.
The Starter Plan offers more than enough for any new blog. You’ll get one free domain name along with unlimited bandwidth and 100GB of disk space. Few blogs ever come near 10GB so you should be all good for a very long time.
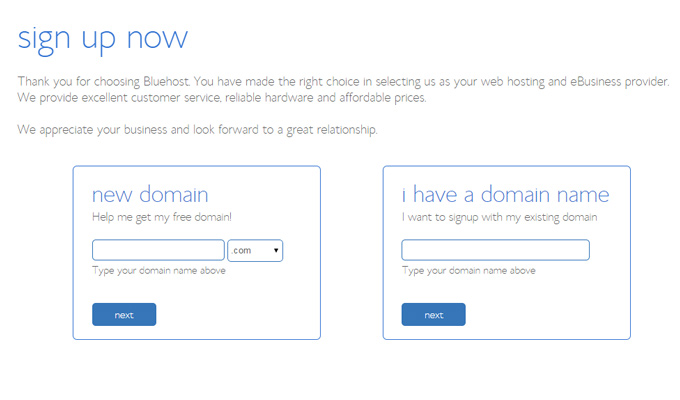
On the next page there’s a form asking to choose your domain name. If you registered through GoDaddy then enter it into the box labeled “I have a domain”. Otherwise take advantage of the free domain offered through Bluehost. Then just follow the checkout process with your payment details and your new hosting account will be all set.
The reason it’s easier to purchase a domain through Bluehost is because they’ll point the new domain to your server automatically. If you register a domain from a registrar you’ll need to log into that account and change the NameServers to point towards your new hosting package.
So if you purchase the domain & hosting together then at this point you’ll be all set!
If you purchased the domain separately then log into your domain provider and find the domain name. It should have a setting labeled “Name Servers” which you can manually edit based on the server information in cPanel(your webhost administration panel).
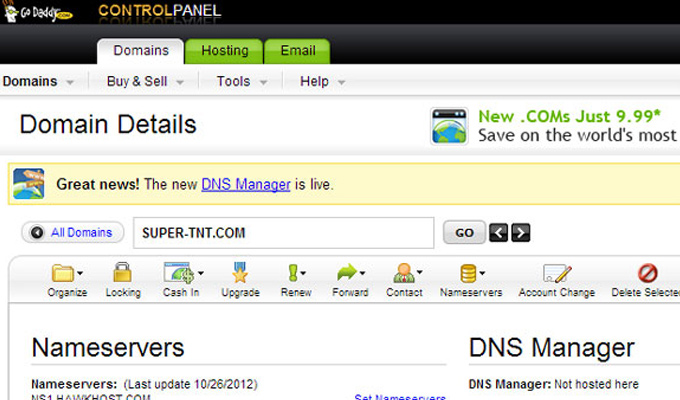
GoDaddy customers will notice a small icon of yellow stacked circles with the label “Nameservers”. Click this and you can edit the values to match Bluehost’s name servers which are the following:
- ns1.bluehost.com
- ns2.bluehost.com
It may take a couple of hours to complete the process if done manually. But when it’s complete you should be able to visit your domain and see the Bluehost default page.
2. WordPress.com Blog Backup
So you’ve got a brand new web server with a brand new domain just waiting for your blog. Now the transfer process can begin!
Log into your WordPress.com blog dashboard and navigate to Tools > Export. This page will have a free export link which allows you to download a copy of your blog contents.
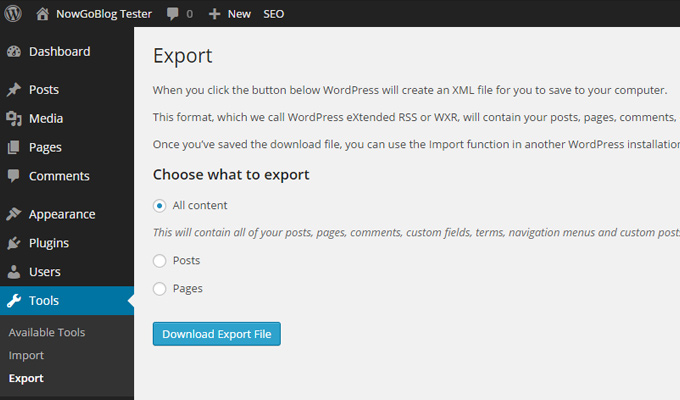
Click the Export link and on the next page make sure “All content” is selected. This will create a single file with all of your blog’s posts, pages, images, navigation menus, custom fields, all the good stuff. The only items which won’t be backed up are plugins and themes – but these can be added manually after the initial backup.
So download this export file and keep it in an easily-accessible location on your computer.
One important point to note is that when importing this file later it will need to be 2MB or less. If your file is larger than 2MB you’ll want to use the WordPress WXR File Splitter program.
Download the WordPress WXR Splitter for Windows or Mac depending on your computer. Then just run the program and follow the instructions. This is a quick process which splits your larger XML file into smaller chunks that can be imported without any trouble.
With this backup saved the next step is to install WordPress on your new hosting account.
3. WordPress Quick Install
There is a short and long method of installing WordPress. Quick value hosting providers like Bluehost and HostGator have tools that can quickly install a brand new WordPress site instantly. But if you want to do it manually that’s another option which will be covered below.
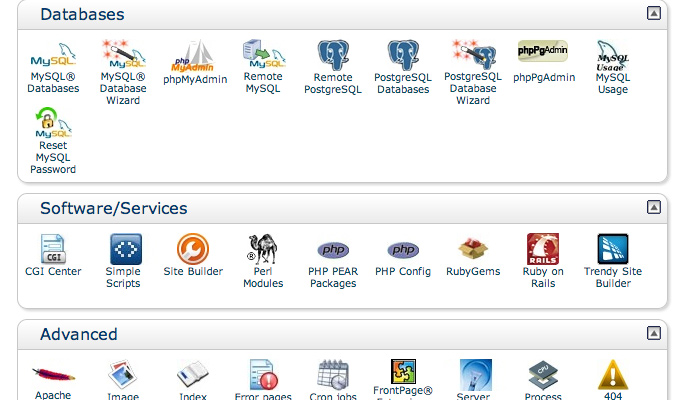
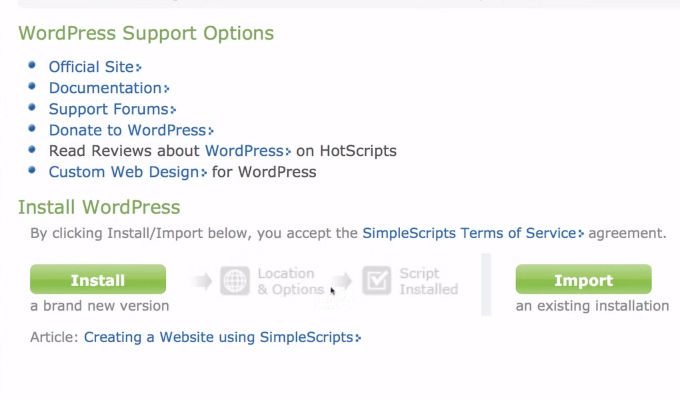
For the quick install option first log into your new Bluehost cPanel. You should notice a bunch of different icons and boxes. Scroll down to the box labeled “Software/Services” and click on Simple Scripts. This opens a page with options for quickly installing a bunch of free web applications.
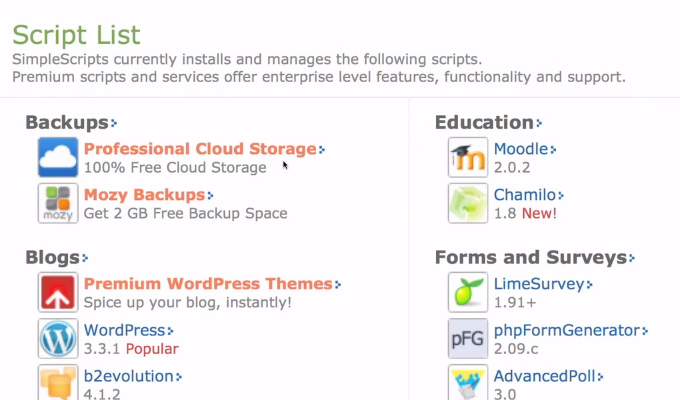
One of the options underneath Blogs should say “WordPress”. This should also have a version number with the most recent up-to-date copy of WordPress. Click the link and it’ll open a new page with further details.
Click the big green “Install” button located at the very bottom of the page. Then you’ll be asked to select the domain where you want WordPress to appear. Your account should only have a single domain so just pick this one.
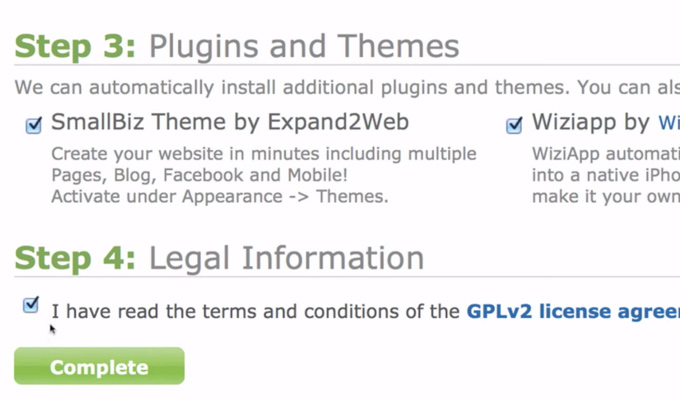
You’ll be offered some custom themes or plugins if you want any pre-installed extras. Feel free to check or uncheck these as desired. Then click “Complete” and the process will unfold automatically.
Once the setup process finishes you’ll be given some login details. The username/password combo is your administrator account which was generated automatically for the installation. Click on the wp-login link and sign into this account to see your new dashboard.
It’s recommended that you update the email address of this admin account just in case you forget the password. WordPress password reset is handled via email so it’s very important that you can access the account email. This account email can be updated from the Users menu in the WordPress dashboard.
4. WordPress Manual Install
If you’ve already done the quick install then skip down to step 5.
The benefit of a manual install is that you get to choose all the setup information. Automated installation creates a random password for your admin account, and it creates a random database name/password. If you don’t care about this stuff then automated is the way to go.
But for those who want to manually install WordPress follow these steps instead.
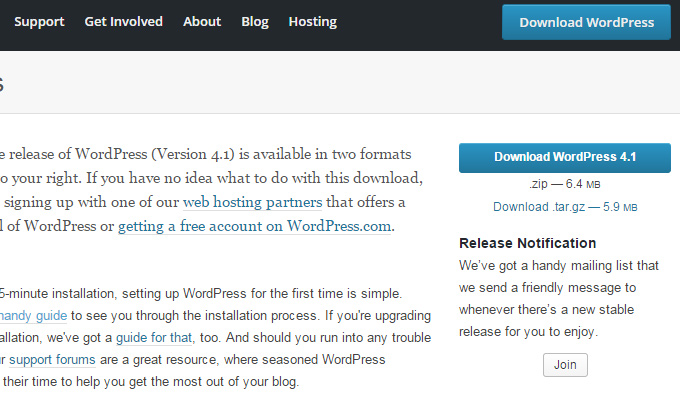
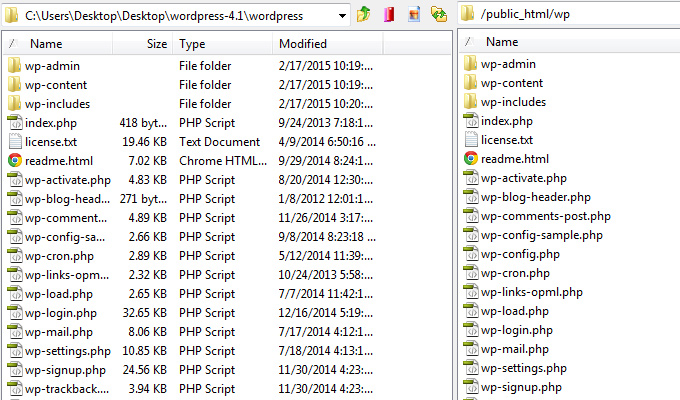
First you’ll want to download the latest version of WordPress from this page. Unzip the files and keep them somewhere nearby.
Next you’ll need a free FTP client like FileZilla or Cyberduck. These applications will connect directly into your web server so that you can transfer files from your computer onto the server. The FTP details can be found in your Bluehost cPanel, but they should be identical to your Bluehost account. So the FTP info should look something like this:
- Domain: ftp.yourdomain.com
- Username: Your Bluehost Username
- Password: Your Bluehost Password
- Port: 21
Once you’ve logged into the server you should notice a set of folders. One should be labeled public_html which contains all the files for your website. This folder may alternatively be named www on some webhosts.
After you’re in this directory it’s a good idea to delete any extraneous files. There may be some generic Bluehost files like “Default.html” or something similar. These really aren’t needed and you don’t lose anything of value by deleting them.
In your FTP client find the window that contains your computer’s files and browse to the WordPress download folder. Make sure you can see all the different PHP files in the window. Then upload every file & folder right to your web server.
This will take a few minutes but when the transfer is finished you should see a mirrored copy of the files on your server.
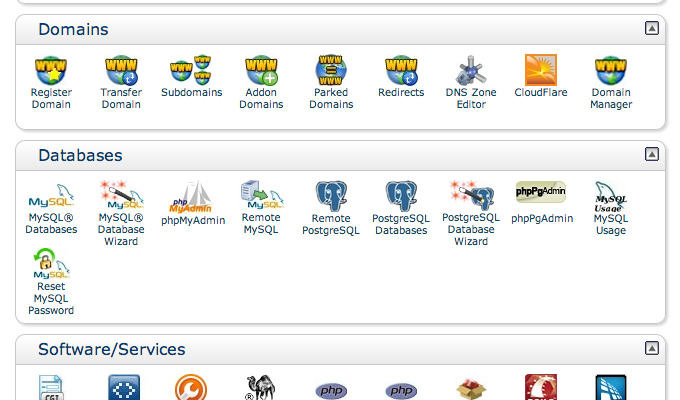
Before installing WordPress you first need to create a new database. So hop back into the Bluehost cPanel and you’ll see lots of icons and boxes. Scroll down until you see the box titled “Databases” and click the very first link labeled “MySQL Databases”.
At this point it’s a good idea to open a Notepad or WordPad window to temporarily store your database information. WordPress needs to know this information once during the setup process – but once the setup is finished you won’t need to know this information at all.
First create a database name with anything you like. The database should have a prefix with your Bluehost username. So it might look something like bluehostname_wordpress. Create your database and then scroll down to the User section.
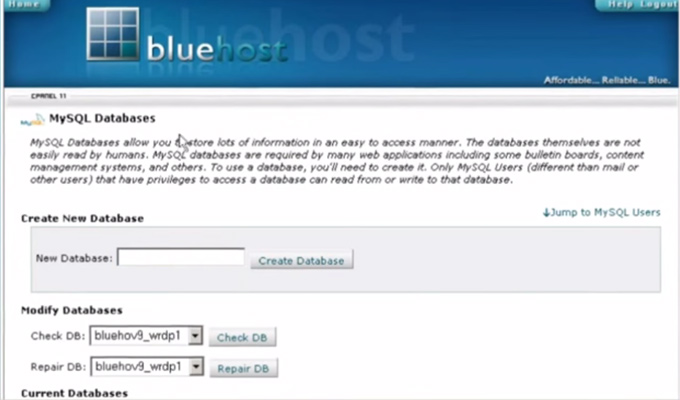
Now you’ll want to create a new database user and password. You will not need to memorize this information, but you will need to keep it handy for the WordPress install. Either keep it in a document or write it down on paper.
Once the user has been created go back to the MySQL Databases page and find the section labeled “Add User to Database”. Select your user and select the database name, then click Add.
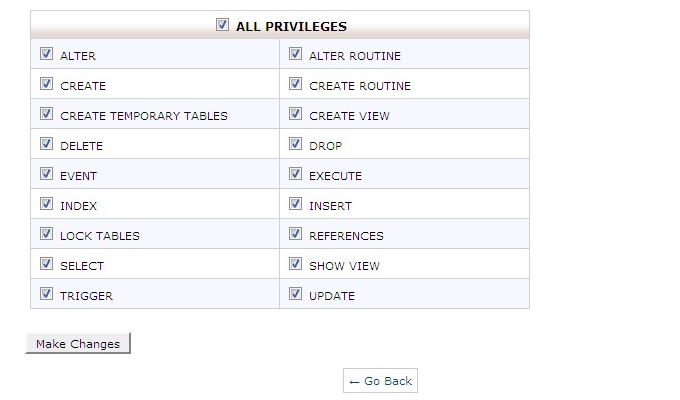
On the next screen check the very top box for All Permissions and hit OK. This gives your new account authority to edit and update the new database, which is required for a clean WordPress install.
Now we can finish up the manual WordPress installation. Make sure you still have the database info handy during this step. In your web browser visit your domain and you should see the introductory WordPress setup screen.
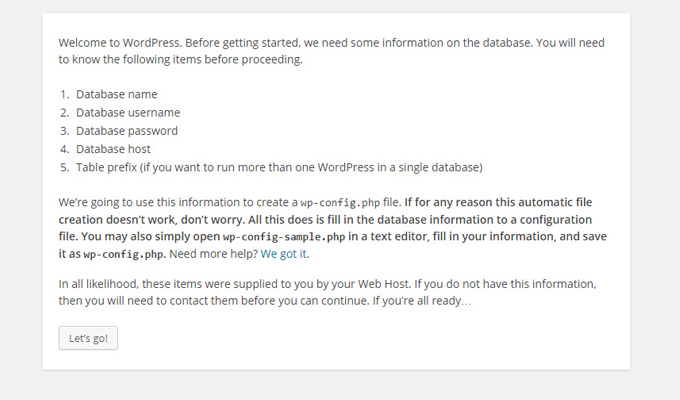
Click the button and you’ll be moved onto the next step. WordPress needs to know the database name, database username & password. Database host is fine as localhost and the table prefix is fine too so leave those options alone.
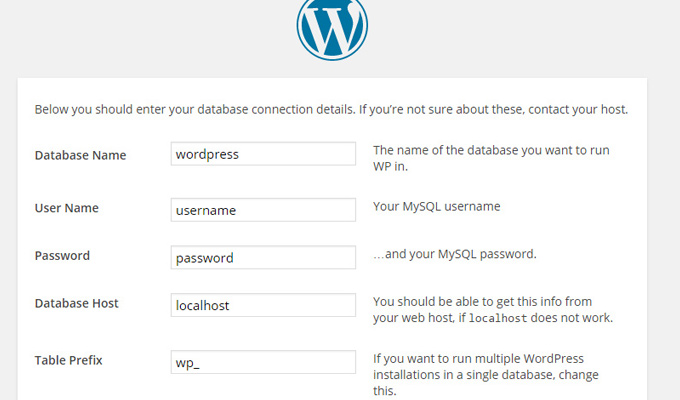
Click “Submit” and you should get a success message. This means WordPress has successfully connected into the database and it should be smooth sailing from here on out.
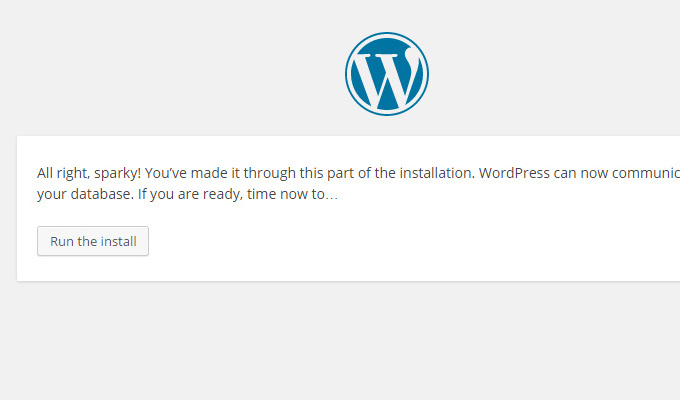
The next page will ask for your WordPress blog’s title. You’ll also need to create your admin account with a username, password, and email address. The email is very important because this is necessary if you need to reset your password at a future date.
Once that information is all set your account should be created. Log into your brand new WordPress dashboard from the admin link which should be visible right on the installation page. Otherwise just visit yoursite.com/wp-login.php to access the login form.
5. Importing your WordPress Backup
Once logged into your new WordPress dashboard navigate to Tools > Import. One of the options will be a WordPress Importer Plugin which is required to import contents. So just click this and the plugin should install automatically. Then click “Activate & Run Importer”.
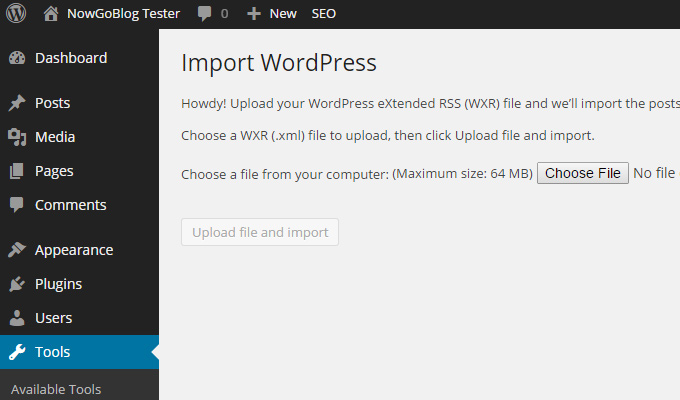
Now you’ll be asked to browse for the XML file which was downloaded earlier. Click the Choose File input and find that XML file and hit OK. Then click Import and the process will begin.
Right away you’ll be offered to assign imported content to a new or existing user. If you just installed WordPress then you should only have one user account to select.
Also make sure that you check the box under Import Attachments. This will ensure that your images and other uploaded media will be added into your new blog. After it’s finished you should get an onscreen success message notifying that all of your content has been moved.
6. Final Clean-Up
As mentioned earlier the Export/Import process cannot handle plugins or themes. If you were using a custom theme with custom plugins then you’ll need to reinstall these manually from the admin panel.
From your old WordPress.com website take a note of your current theme and list of active plugins. Then in your new WordPress site go to either Plugins or Appearance > Themes and click “Add New”.
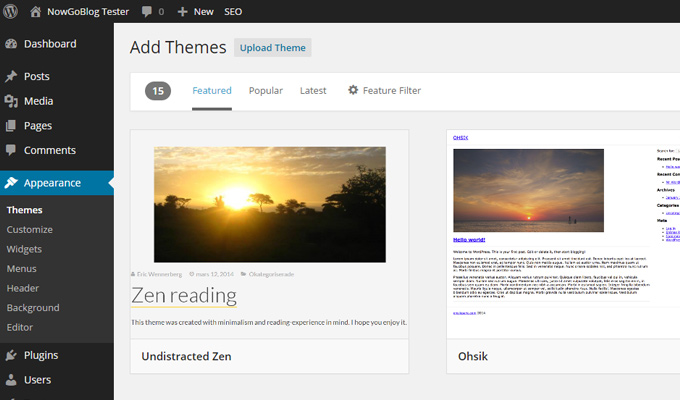
From this page you can search for each plugin or theme and they can be automatically installed to your new site within seconds.
Unfortunately you will have to manually change plugin settings, widget locations, and theme settings to match your old WordPress.com blog. Although this is somewhat annoying, it’s not too difficult since you can just flip back and forth between the two dashboards and copy the settings accordingly.
One last quandary is what to do with your old WordPress.com domain. If you go into Settings > Reading you can set the blog to private so it won’t be accessible anymore. The other alternative is to let visitors know that your WordPress.com blog has changed to a new URL.
The quickest and cheapest way to do this would be writing a blog post or adding a big banner into the WordPress.com theme heading. You can make it really simple by just stating that your blog has moved including the new URL.
It’s best to go with the banner option because this way people who find one of your posts will still notice the banner on every page. But if you only make a new post it won’t be noticeable until a visitor hits the blog’s homepage. If your WordPress.com blog doesn’t have a lot of visitors then you could alternatively just shut it down.
But the point is you probably want to do something with it instead of just leaving it to rot.
At this stage the transfer process from WordPress.com to a self-hosted server is complete. Now you can celebrate by logging into your new WordPress blog and writing some great posts.

