So you’re new to WordPress and need a detailed look at how it all works? Well you’ve stumbled onto the perfect article.
Once logged into the WordPress dashboard there’s a whole bunch of menus and boxes and lots of shiny things to edit. The WordPress setup process is rather straightforward, but doesn’t offer much in the way guided tours for getting started. So where exactly do you begin?
Use the following guide as a reference point for each crucial area of the WordPress admin dashboard. This post offers details and tips that every new WordPress user will want to know. Whether you’ve just installed a new blog or need to find specific information about the admin panel, this guide has all of the answers you’d ever need to manage a WordPress website.
The Main Dashboard
Once logged into your website the main dashboard page contains an overview of the installation. The whole dashboard page is made up of smaller widget boxes that contain specific information. “Right Now” displays a succinct overview of stats like total posts, pages, and comments.
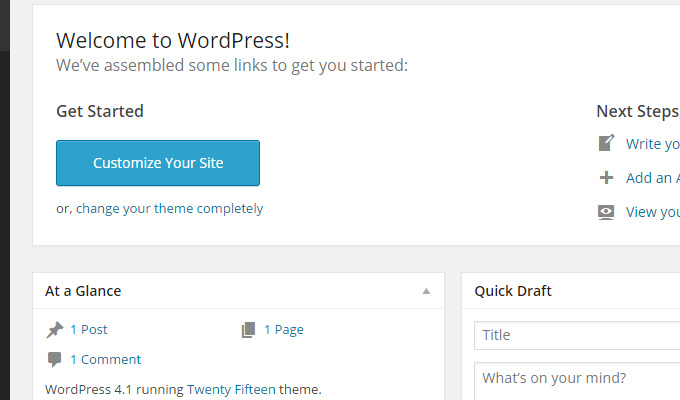
A free plugin named Right Now Reloaded adds more information into this box. You’ll be able to see the currently active theme, version of WordPress, plus links to view all posts & draft posts separately. There isn’t a lot to do on the dashboard since most of the widgets are just quick features.
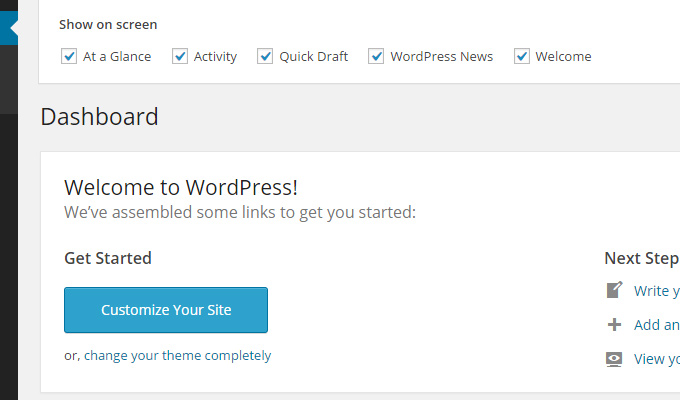
If you want to display more dashboard widgets look for the small tab link in the top-right labeled “Screen Options”. From here a toggle menu appears where you can check off widgets that you want to hide or display.
The dashboard section also includes system updates. Plugins and themes are often release updates with newer versions, and you’ll be notified each time a new version has been released. By default these won’t automatically update so you’ll need to manually update from the dashboard. All you do is click an “update” button and WordPress will take care of the rest.
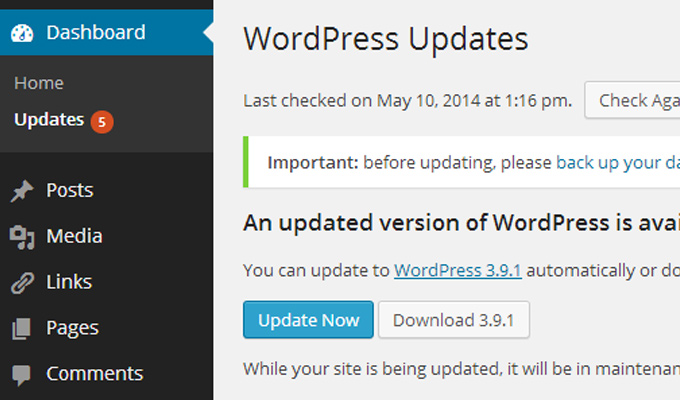
WordPress itself also gets updates, but some can be set to auto-update. However big releases of WordPress do require a manual update just like plugins and themes.
It is possible to set auto-update for these features but it requires a little bit of coding. Take a look at the configuring background updates help page for more information.
New Posts and Pages
There are two default methods of adding content into a new WordPress site: posts and pages. Both of these content types have a similar creation process so the editing page will become familiar quickly.
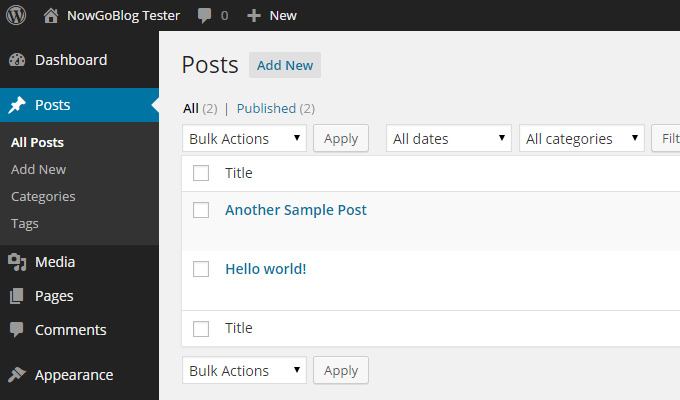
When you click on “Posts” or “Pages” a table will list out content sorted by recent publication date. You’re free to search this table using keywords found in the post title. By clicking on a title you’ll be taken to the editing page which shows all of the current information for that post or page.
To create new content look for the “Add New” link at the top of the page, or also in the sidebar menu. Creating a new post looks identical to the edit screen except a new post is completely blank. Features are located in the exact same position so it’s easy to grow accustomed to how it all works.
Visual Editor
When creating a new post or page you should start by adding a title. This will be displayed as the post headline or as the page’s title. WordPress automatically generates a URL once you’ve entered a title, so this should definitely be your first step. Then it’s time to start adding content with the editor.
It’s important to learn how the visual editor works because this is the primary interface for adding content. By default new content uses a visual editor where the content is previewed right on the screen.
The alternative is to switch into a text-based editing mode where you edit directly in HTML.
To switch between these two modes locate the tabs on the right-hand side of the editor. New bloggers who are not familiar with HTML should stick with the default visual textbox.
Each icon in the toolbar will edit text based on an individual function. When you hover an icon it will display a tooltip which explains the functionality(ie: bold, numbered list, hyperlink, etc). One special button will add a “Read More” tag into the text. This is a location chosen by the writer which creates an excerpt for the post.
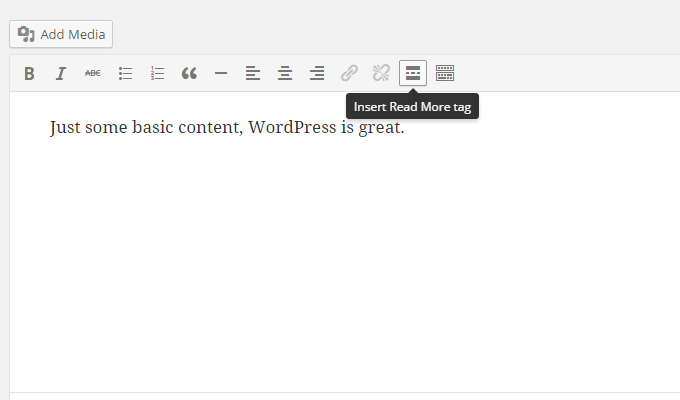
An excerpt is only used in blog posts because it’s not needed for pages. When visitors are browsing the homepage or archives listing they’ll see post excerpts and a read more link. By clicking the link visitors will be taken to the full article page.
This is a necessity because otherwise your homepage would display the full length of every single post in a row.
One other important aspect of the editor is how you upload images. These can be uploaded individually or in bulk from the “Add Media” button. It opens an overlay window containing an upload form where you can select images from your computer to add into WordPress. Then images can be directly added into a post using this same media editor.
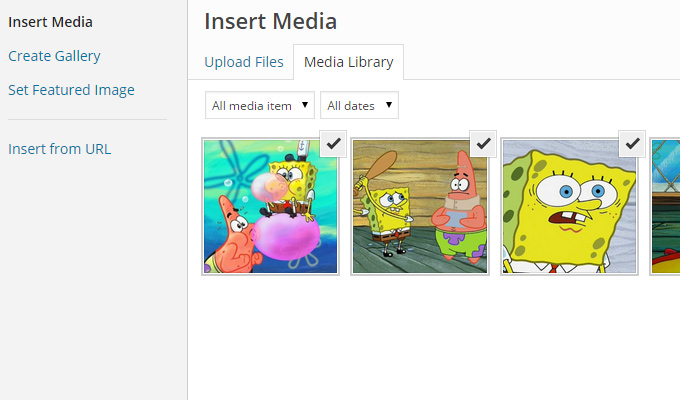
The great thing about this editor is that all media can be accessed from any post or page. So if you have images that should be re-used there’s no need to upload them multiple times. Just search through the media listing, find your image, and then add it into the content.
Also you can insert external media from another URL by clicking the “Insert from URL” button. Overall the layout is fundamentally childproof so it would be difficult to really mess things up.
Categories & Tags
To the right-hand side of the editor window are some information boxes. At the top is a publishing box followed by categories and tags.
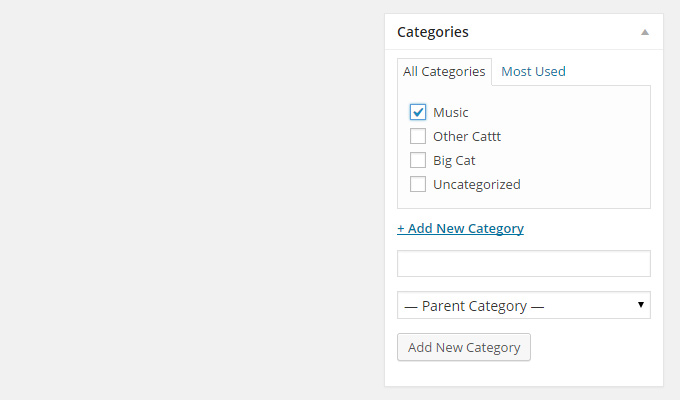
Some bloggers use only categories and no tags. Others choose to use both with multiple tags and categories. How you want to use these features is entirely up to you.
The most common method is to select only 1 category per post with multiple tags. This way posts can be archived into single categories but also searched by tag keywords.
Categories are selected by checking an existing choice, or adding your own from the “Add New Category” link. Tags are added manually by typing in the tag name and clicking “Add”. As you type WordPress will offer suggestions based on tags that have been used before. But you can also select from a pre rendered tag cloud by clicking the “Choose” link.
If you only go with one of these details it’s recommended to go with categories. They are seen as more hierarchical and important to blog organization.
Publishing & Extra Features
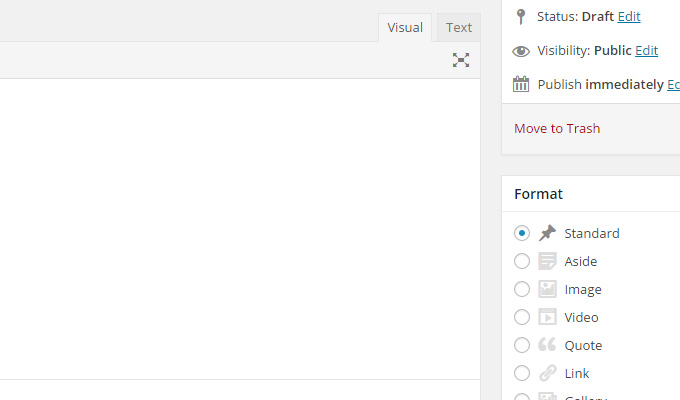
When the post has a title, some content, and you’ve setup a category(or categories) then it’s time to deal with publishing. Not every post needs to be published right away because sometimes you’ll want to save it as a draft for future editing. Other times a post won’t need editing but it should be published at a later date.
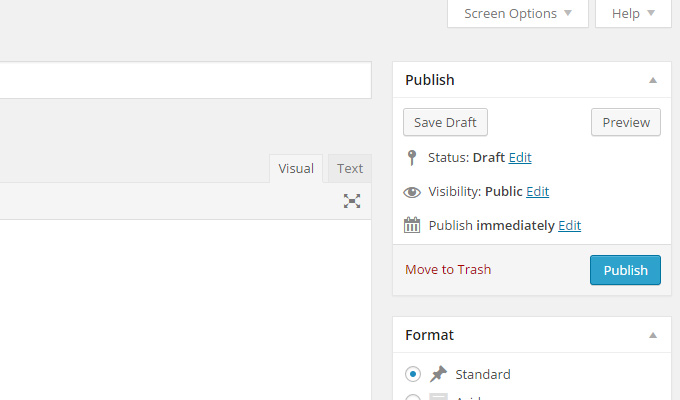
To save the post as a draft click the “Save Draft” button in the top-left corner of the publishing window. To publish right away click the big blue “Publish” button. And if you want to delete a post click the red “Move to Trash” link.
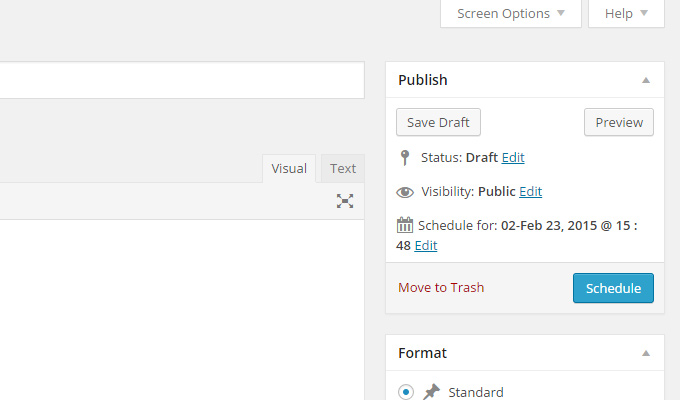
But to schedule the post for a future date requires a little bit more work. Notice where it reads “publish immediately” and beside the text there’s a little edit link. Click edit and you can adjust the date to be anytime in the past or future.
By dating a post to the past it’ll be published right away, but the publishing date will say whatever you set it to. By scheduling a post in the future the post will automatically go live to your blog at the exact date and time you choose.
You’ll know a post has been set in the future because once you hit OK the blue button’s text will change from “Publish” to “Schedule”.
This covers all of the basic functionality when writing or editing a new post. There are some other things you can setup like featured images and custom excerpts, but they’re not required.
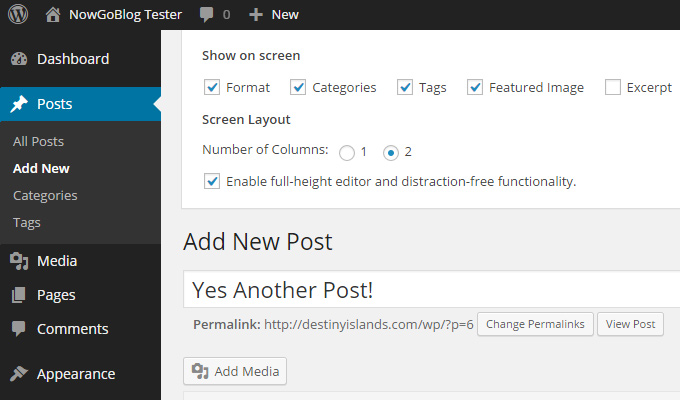
By default these options may be hidden from sight. To view these boxes locate the “Screen Options” tab in the top-right corner. This will again provide a toggle menu with checkboxes for individual features. Check the ones you want to see, uncheck the ones you want hidden. You can also change the number of columns or extend the post editor to be full-height based on content size.
The interface is quite straightforward and very easy to change as you grow familiar with WordPress.
Comment Moderation
By default WordPress has its own comments moderation area. This is where you can approve or delete comments which are pending approval, or even delete published comments. Spam is a huge problem for most WordPress blogs since the comment form is relatively predictable.
But every WordPress blog comes with a free copy of Akismet that automatically clears spam.
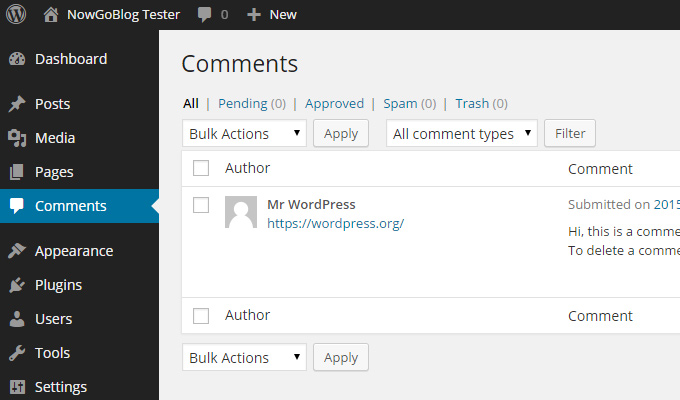
As the administrator you have control to edit existing comments or trash them at your own whim. Just hover over a comment to view admin controls, or search for a specific comment you want to remove. The default comment system is not inherently bad – there are just better alternatives.
The two most popular plugins for custom WordPress comments are Disqus and Facebook. Both are completely free and they include their own separate moderation panel.
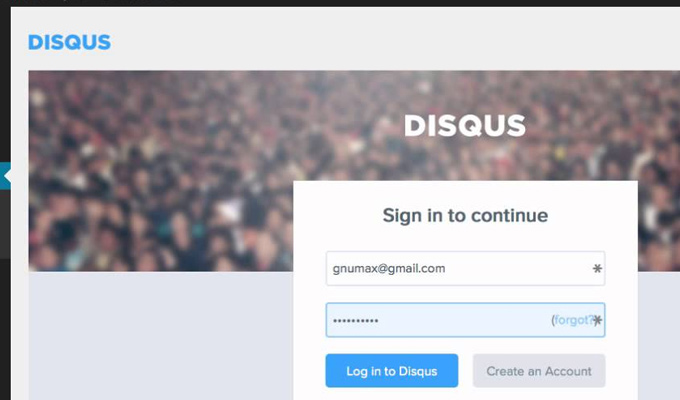
If you’re just getting started using WordPress try either of these in place of the default comment system. Disqus seems to be the most popular choice because it’s a system dedicated to comments. Their anti-spam techniques are unmatched and the moderation dashboard is super easy to learn.
On the other hand Facebook is almost a global phenomenon and includes the “Like” feature on comments. The downside to Facebook is that some people may not want to leave a comment that links to their name and public profile.
The best option for a general blog is definitely the Disqus system. It’s really easy to manage and commenters aren’t required to log into an account like Facebook. Disqus has an option for anonymous comments which can be moderated at your choosing.
Theme Appearance & Customization
WordPress has an Appearance menu which grants control over various design features. By clicking on the Appearance link you’ll be directed to the Themes page. This page lists all of the current themes installed in your blog. Each theme has a preview image along with a button to preview the design on your website.
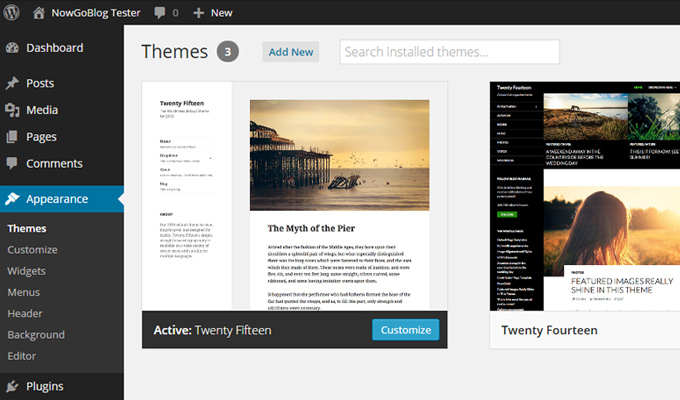
It’s very easy to install a new theme using the “Add New” button. This will search through WordPress’ growing library of free WordPress themes which can be installed at the click of a button. If you have a custom theme which can’t be found through WordPress it will need to be uploaded manually to the server using FTP.
When a theme is activated you’ll notice a small “Customize” button located near the screenshot. This will bring you into the customize screen where specific options can be edited directly.
Optional Customization
Keep in mind that not all themes will support the customization feature. This option needs to be coded into the theme by the theme designer. Most free and premium themes do support customization since it’s a relatively popular system for WordPress users.
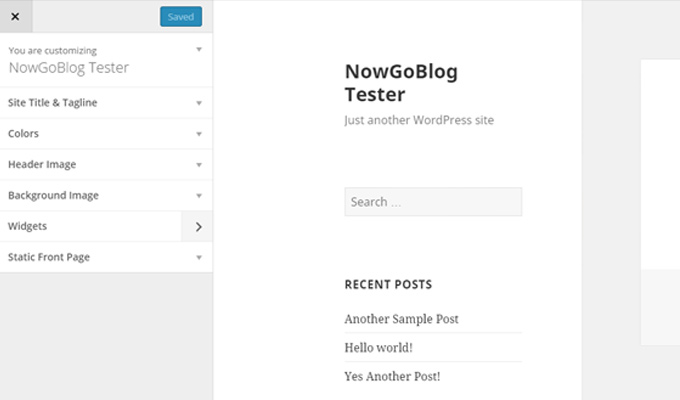
Customization options may be anything, yet often focus on more “big picture” kinda stuff. This might include the blog title & slogan, color schemes, font choices, navigation links, or number of sidebars. This feature offers a lot of detail to developers so each theme will have it’s own set of options.
The updates can be previewed in real-time before saving changes. To learn more take a quick look at the appearance customization screen in the WordPress documentation.
Editing Widgets
Every WordPress site comes with a number of predefined widgets. These are found in the widgets menu where they can be added or removed to certain areas of the blog layout.
Widgets are placed into widgetized areas which must be coded into a theme. The most common places for widget areas will be in dynamic sections of the website: sub-header, footer, sidebar(s), or underneath post content.
Unless you know how to edit a WordPress theme you won’t have much control over the widgetized areas. But you can always move widgets around to different areas that have been coded into your theme. Every WordPress theme should come with at least 1 widgetized area.
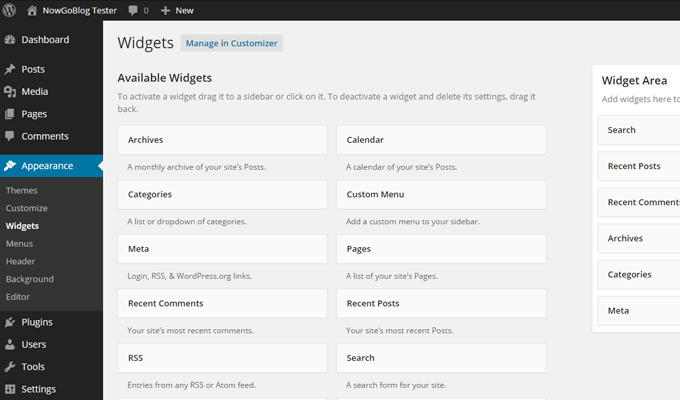
All you have to do is drag-and-drop a widget into the preferred area. Some widgets include optional parameters like setting a title or number of archive links to display. To remove a widget simply drag it off the widget area and drop it into the list. Updates happen instantaneously so it’s a very snappy interface.
Widget content ranges from tag clouds to search fields and even plain text boxes. There are lots of default options to choose from, and many plugins will also include their own widgets.
Custom Menus
Theme developers can add custom menus just like custom widget areas. These menus are usually fixed in one location, but may be moved if you know how to edit the theme directly. Either way the links in these dynamic menus can be edited from “Menus” underneath Appearance.
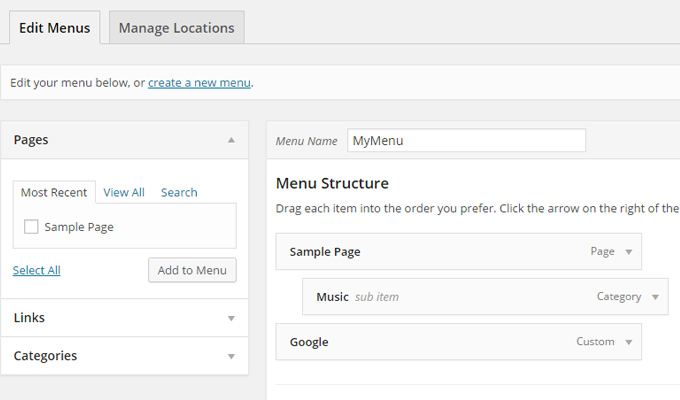
The first step is to create a new menu. Give this any name that you’ll recognize because it won’t show up on the blog. Then you have a choice of adding links to the menu based on pages, posts, categories, or even manually. It’s easily possible to add internal & external links to the same menu.
Once you have a few links added into the menu they’ll appear as drag-and-drop boxes. Rearranging the link order changes how the links are displayed on the page. You’ll also be able to change the link text if needed.
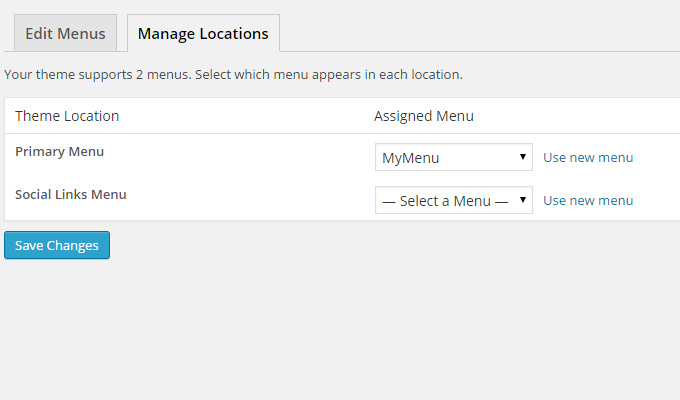
Finally to get a menu onto your site just click the “Manage Locations” tab near the top of the screen. This page includes each custom menu location with the currently assigned menu. Just change each dropdown to whichever menu should appear in that location and hit “Save Changes”.
Super easy way to add custom nav menu links into any part of your site.
Theme Editor IDE
Finally the very bottom “Editor” link is how you can directly edit theme files. Only use this feature if you have experience with HTML/CSS or know about customizing websites.
WordPress themes are built using HTML mixed in with PHP. It’s easy to make a mistake while editing and completely mess up the theme. So if you’re going to edit then at least try to do so on a test website before updating the changes live to your blog. It also helps if you have some PHP debugging skills.
Managing Plugins
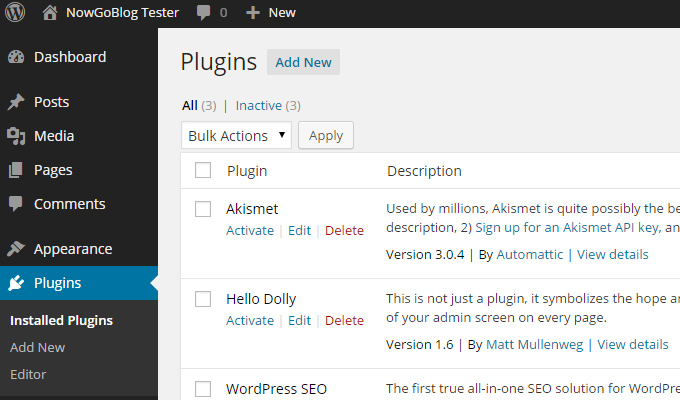
By default WordPress comes out-of-the-box with two plugins. Akismet is a spam prevention tool which is handy if you plan to use the default WordPress comments system. Hello Dolly is more of an aesthetic plugin that adds a random quote from the song Hello, Dolly! into your dashboard panel.
These two plugins aren’t great or even necessary on most blogs. So at some point you may want to delete them or install some more useful alternatives. This can be accomplished from the Plugins admin menu. From the main page you’ll see a list of current plugins both active and inactive.
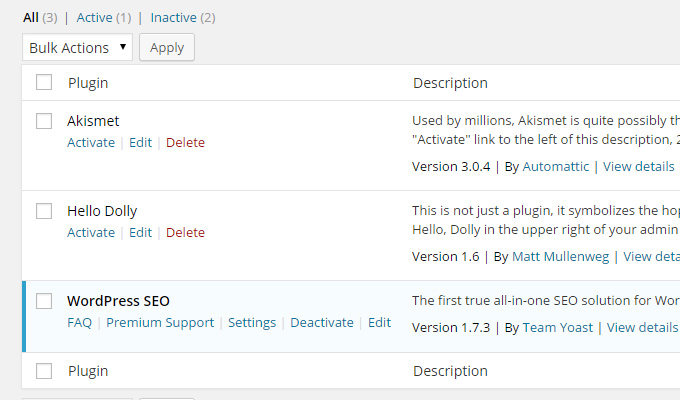
To activate a plugin just click the “Activate” link found underneath its title. When the plugin is activated this link changes to read “Deactivate”. More complex plugins may also have a settings link where you’ll be able to customize options for the plugin.
Really detailed plugins even have their own custom admin panels with various pages and features. Pay attention to these plugins and be sure that you fill out any required information to get them working properly.
Installing New Plugins
Plugins behave much like themes & they can be installed the same ways. You can either manually upload the plugin contents to your server, or search for the plugin using the WordPress plugins search.

Click the “Add New” link to be taken to a search page. Newer versions of WordPress include recommended plugins along with an internal upload feature. If you have a custom plugin that must be uploaded you can try this feature instead of going through FTP.
But if you know the plugin is hosted on WordPress’ plugins directory then you can search for it by name. Once you find it in the search results click “Install” and let WordPress do its thing. After the installation is complete you can activate the plugin and start using it right away.
WordPress Users
A brand new WordPress site will only have one user account in the database. This will be your admin account which was created during the setup process. But it’s possible to add new users manually or let others register through a signup form.
The user menu is a table of users, their emails, and their individual roles on the site. Each user account has a role which determines how much they’re allowed to do on the site. WordPress has a roles and capabilities page which goes further into detail, but here’s a general overview of each one:
- Administrators – can access all menus and settings within a WordPress site
- Editors – can publish, schedule, and edit all posts(including posts of other users)
- Authors – can publish, schedule, and edit their own posts
- Contributors – can write and edit their own posts, but cannot publish or schedule anything
- Subscribers – can manage their own profile
Each user has their own profile and each role has the ability to edit their own information.
Subscribers are the only roles that have no practical access to the backend features. Subscriber roles are often used for newsletters and email plugins which send out new post updates.
From the users list administrators have the power to edit another user’s role to be higher or lower in authority. They can also delete users or manually add users with a username, email, and password combo.
Unless you’re bringing on new writers then it’s best to not worry about the users menu. But user roles are worth remembering because they have a large impact on the structure of a multi-author blog and the editorial process.
WordPress Tools
The least-used section of WordPress is located inside the Tools menu. By default this includes a small bookmarklet to save web snippets, along with an import/export feature. So this menu is rarely needed unless you’re backing up or restoring a copy of your blog.
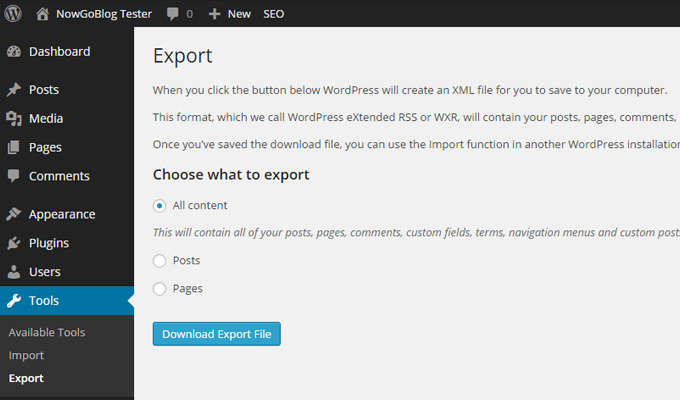
Some plugins will add their own menus into the Tools area because it’s so empty. But it’s more common for plugin menus to be found in the Settings link. For the most part you won’t need the tools menu at all – but it’s good to know what’s under the hood just in case.
Main Blog Settings
The settings menu contains all the little details and specifics about your WordPress site. The General link contains some overall settings which can be setup once and left alone.

The website title and URL should auto-fill from the initial setup process. The email address will be considered the administrator’s email, but can be updated if you want it to be something else.
Other settings are date formats, time formats, and registration options if you want to allow open registration. For the most part you could just leave this stuff alone and be fine.
In the writing section you’ll only find a couple settings that should be setup once and left alone. This page includes the default category which will be selected for each new empty post.
Overall the writing page doesn’t have very much important stuff and it’s not really a necessity to play with any settings.

The “Reading” menu has slightly more important settings related to the display of your blog. You can change the homepage to either list recent blog posts, or display a static page instead. If you change the homepage to a static page your blog archive will be listed at a different page URL.
From the reading menu it’s also possible to change the total number of posts per page. By default this is set to 10 posts per page, however you can increase or decrease the number as you wish.
Discussion Comments
If you’re using the default WordPress comments then the discussion settings are important. From here you can setup when users are allowed to post comments, how much information is required, and how long before closing comment sections.
There’s also a blacklist which can include specific keywords, email addresses, or IPs that are not allowed to post comments. WordPress has a lot of different options for their comment system so take a peek if you plan on using it.
Otherwise just go with a custom plugin like Disqus Comments or Facebook. These plugins have their own settings panel which disregards most of the WordPress settings.
Media & Permalinks
On the media settings page you’ll find some details for setting up post thumbnails. These settings are usually created automatically by your theme so it’s unlikely that you’d need to change anything.
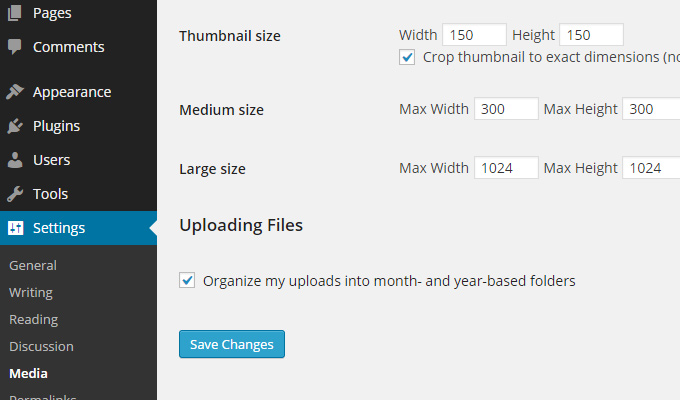
But there is a section labeled “Uploading Files” that is worth your attention. With this option checked it will automatically create new directories based on the month and year at the time of upload. So images uploaded in the month of May will have a separate folder from June, July, and so on.
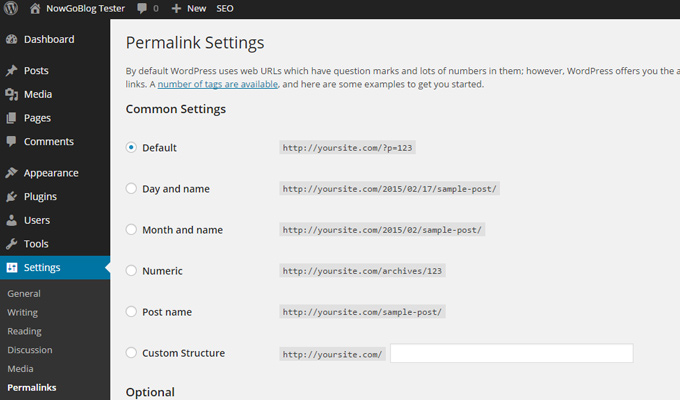
Towards the bottom of these settings links you’ll find one labeled “Permalinks”. This option should be setup almost immediately after installing WordPress.
Permalinks are the URL structures for the entire website.
By default WordPress uses a query ID for each page. You can see this default choice in the screenshot above where the example looks like ?p=123. This isn’t great for visibility because the URL is hard to remember and uses arbitrary ID numbers.
All of the other choices are much better since they rely on post information. You can organize content based on publication dates, authors, or even just post name titles. The last option is a custom field where you can enter your own permalink structure. It requires a little understanding of permalinks to make your own structure, so if you choose this option make sure that you know what you’re doing.
Otherwise just go with the Month and Name or simply Post Name. Keep in mind that permalinks with dates only apply to blog posts. Your pages will only use the title in the URL and won’t have any date info in the permalink.
Alternate Plugin Settings
If you’ve installed a few plugins you may notice some extra menus under the Settings link. These menus will only appear while a plugin is active. Some of them just have optional settings, others are really important and vital to the setup.
Generally if you install a new plugin and don’t know where to customize it, you’ll find a link under the settings menu.
Mastering WordPress
This whole administration panel may seem very confusing at first. But like most new skills, you will get better with practice.
Keep this guide bookmarked and use it as a reference as needed. It’s easy to forget where specific features are located or how to perform a certain action. But once you’ve been using WordPress for a while the dashboard menus will become like second nature.